Andi is going to be away on vintage at Bests Great Western in the 2018 wine making season. I therefore have free reign to play and am slowly converting the garage of our rental into my very own winery! I plan to ferment several batches of wine and am hoping to make a Pinot Noir, Shiraz and a Chardonnay. It is almost impossible to find anyone online who will sell small batches of high quality grapes for home winemaking (Except for Shiraz Republic who we used last year of course). However Andi has made some good contacts in the growing industry and we’re hoping to be able to buy some surplus grapes from them.
I want to produce a premium quality wine which has a complex and interesting flavour profile, or at least get as close to it as I can. I’m learning that this is harder than just throwing some grapes and yeast together and letting them work their magic!
One element of producing a more complex wine is controlling the temperature of the fermenting must. Keeping the ferment at a cooler temperature slows down the activities of the yeast, allowing them to produce more flavour compounds and thus a more interesting wine. Large wineries do this with tanks that have cooling jackets or have built in refrigeration coils. That might be a bit much for the garage at our rental property. I have therefore decided to build us a fermentation chamber.
Fermentation Chamber?
The home fermentation chamber is essentially a miniature cool room. It consists of a small fridge with the door removed and an insulated box built on the front. The chamber is big enough to fit several fermenting demijohns side by side. Whilst the fridge cools the whole space down to a nice regulated temperature.
The specs. The Fermentation Chamber must:
- Be well insulated to handle the Australian summer
- Be powerful enough to cool the space to a constant 15 degrees C
- Not to cost a fortune to run
- Be big enough to hold 3 x 35L demijohns (or plastic fermenting tubs for reds)
- Be mounted on solid casters so that it can be moved easily.
- Not look like it was built by 16 year old me! (My last major home build project was a skate ramp!
It would be nice for the chamber to have;
- An ample sized door on the side for getting heavy demijohns in and out
- A hinged lid allowing access to easily take samples from each demijohn without losing all the cold air
- A whiteboard on the outside for making notes
- Anything else that we come up with along the way!
Begin at the beginning
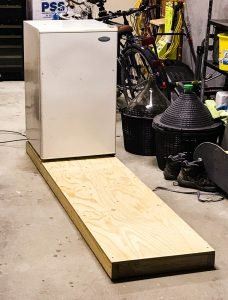
I started with the fridge, picking up a second hand bar fridge with a good sized freezer element (cooling coil) on the inside for $80 off Gumtree. I figured the bigger the cooling coil, the more powerful the fridge would be. And therefore better at cooling a large space without blowing up!
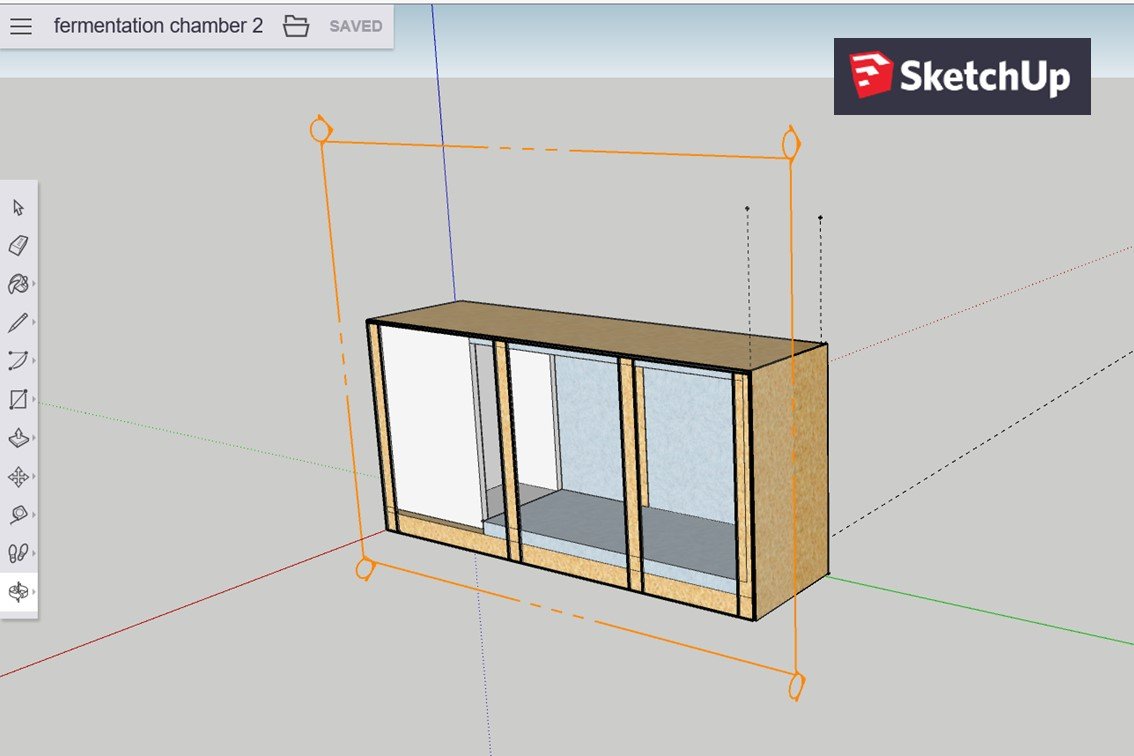
The fridge is a nice round 500mm wide. I designed the frame around this using Sketchup. A free browser based CAD drawing tool (See the main image on this post) which is surprisingly quick to pick up with a bit of effort.

Cutting my timber to the right length
I took my measurements to Bunnings warehouse and had them cut my timber for me to the specs I had come up with. The only thing is that Bunnings like to cut their timber ever so slightly longer than you actually ask for it. I had to spend the first hour or so sawing anywhere between 3 and 6mm off each of my pieces of timber – thanks Bunnings! Apart from getting it in the car, I would have been better off cutting it all myself!
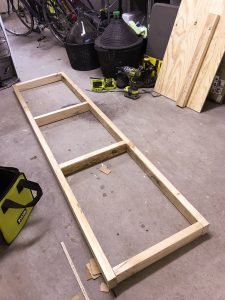
Once all of the timber was cut to the right length, assembling the frame was surprisingly easy. I didn’t have any clamps etc. and didn’t acatually spend a lot of time ensuring that everything was square. The frame was very slightly skewed as a result but weight of the rest of the chamber should flatten it out so I’m not too worried.
Next step was to add the floor of the chamber for the fridge to sit on and once again I had to cut this down by about 6mm. With a little bit of ‘encouragement’ and some work with a rasp, it matched the frame nicely.
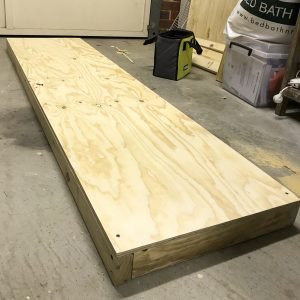
The base of the fermentation chamber is complete
By the end of the first session I was feeling pretty good with myself. The fridge fit on top of the base perfectly, things seemed to be reasonably square and things were looking pretty good!
Next up
The next post talks through the rest of the build. Enjoy and if you have any questions feel free to comment on the post.